Use Arcade in GitHub Copilot
Outcomes
Connect GitHub Copilot to an Arcade Gateway.
Prerequisites
- Create an Arcade
- Get an Arcade API key
- Create an Arcade MCP Gateway and select the you want to use
Set up GitHub Copilot
VS Code
In VS Code, Github Copilot will automatically detect the configured servers. Read the VS Code instructions to set both of them up.
JetBrains IDEs
The GitHub Copilot extension for JetBrains IDEs does not currently support remote servers with Dynamic Client Registration. To use an Arcade with GitHub Copilot on a JetBrains IDE, you must configure the MCP gateway as Arcade Headers in the dashboard.
- In the lower right corner, click the GitHub Copilot icon.
- From the menu, select “Open Chat”, make sure you are in mode, then click the icon.
- A dialog will open with a list of . On the bottom left, click ”+ Add More Tools…”
- This will open the
mcp.jsonfile in the editor. In themcp.jsonfile, define your servers.
Arcade Headers
{
  "servers": {
    "mcp-arcade": {
      "url": "https://api.arcade.dev/mcp/<YOUR-GATEWAY-SLUG>",
      "requestInit": {
        "headers": {
          "Authorization": "Bearer {arcade_api_key}",
          "Arcade-User-ID": "{arcade_user_id}"
        }
      }
    }
  }
}
Arcade Auth
The GitHub Copilot extension for JetBrains IDEs does not currently support remote servers with Dynamic Client Registration. To use an Arcade with GitHub Copilot on a JetBrains IDE, you must configure the MCP gateway as Arcade Headers in the dashboard.
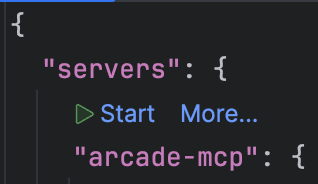
Once you save the mcp.json file, a start button will appear over the new server name. Click it to start the server.
tools are only available in mode.
Visual Studio
The GitHub Copilot extension for Visual Studio does not currently support every remote server with Dynamic Client Registration. To use an Arcade with GitHub Copilot on Visual Studio, you must configure the MCP gateway as Arcade Headers in the dashboard.
In Visual Studio,
-
In the upper right corner, click the GitHub Copilot icon.

-
On the bottom of the GitHub Copilot panel, click the icon (two wrenches).

-
A dialog will open with a list of tools. On the top right corner of this dialog, click the ”+” icon to add a new .

-
This will open another dialog. Fill in the information for your server. You will need to choose:
- Destination: The path to the configuration file, if you choose “Global”, the will be added to all solutions. If you choose “Solution”, the MCP gateway will be added to the current solution only.
- Server ID: The ID of the server you’re adding, this is how it will be displayed in the list of servers.
- Type: For gateways, you must select “HTTP”.
- URL: The URL of the gateway.
- Headers: The headers to pass to the gateway.
- Click “Save” to add the server.

-
Once you save the server, it will be added to the list of servers. It will be disabled by default. To enable it, click the checkbox next to the server name.

-
Once the server is enabled, it will be available in the list of . If tools are not available, you may need to open the
.mcp.jsonfile you picked as the destination. Visual Studio will display a “Configure” and “Reconnect” buttons on top of each entry. Clicking “Reconnect” should fix any issues.
Arcade Headers
{
  "servers": {
    "mcp-arcade": {
      "url": "https://api.arcade.dev/mcp/<YOUR-GATEWAY-SLUG>",
      "headers": {
        "Authorization": "Bearer {arcade_api_key}",
        "Arcade-User-ID": "{arcade_user_id}"
      }
    }
  }
}
Arcade Auth
The GitHub Copilot extension for Visual Studio does not currently support every remote server with Dynamic Client Registration. To use an Arcade with GitHub Copilot on Visual Studio, you must configure the MCP gateway as Arcade Headers in the dashboard.
Eclipse
Coming soon…
XCode
Coming soon…
Try it out
- Open the chat pane (typically command-l on MacOS)
- Make sure you are in mode
- Ask the to use a .